Fair warning - this post is loooong and and even more boring than usual unless you're one of a small handful trying to decide if they want to tackle inspecting and packing their own wheel bearings. Keep in mind that this is based on a 2010 Scamp 19. Others will be similar but may differ in the details.
The first step is to securely support the trailer with the wheels off of the ground. Place the jackstands under the frame, not under the axle.
You could remove the wheels and tires first, but I elected to keep the wheels and tires mounted to the hub, so the next step for me was to remove the dust cap from the hub. The dust cap is an interference fit with the hub. I used a scraper between the hub and flange of the dust cap to start the removal.
Once the dust cap removal was started, I could fit my small rolling wedge bar behind the flange to complete the removal of the dust cap.
As near as I know, these bearings had never been inspected. The cotter pin on the street side wheel was bent in such a manner that the end of it was rubbing on the rubber plug on the end of the dust cap, shaving off slivers of rubber from the Zerk access plug. Remove the cotter pin and castellated nut and then slide the wheel off the shaft.
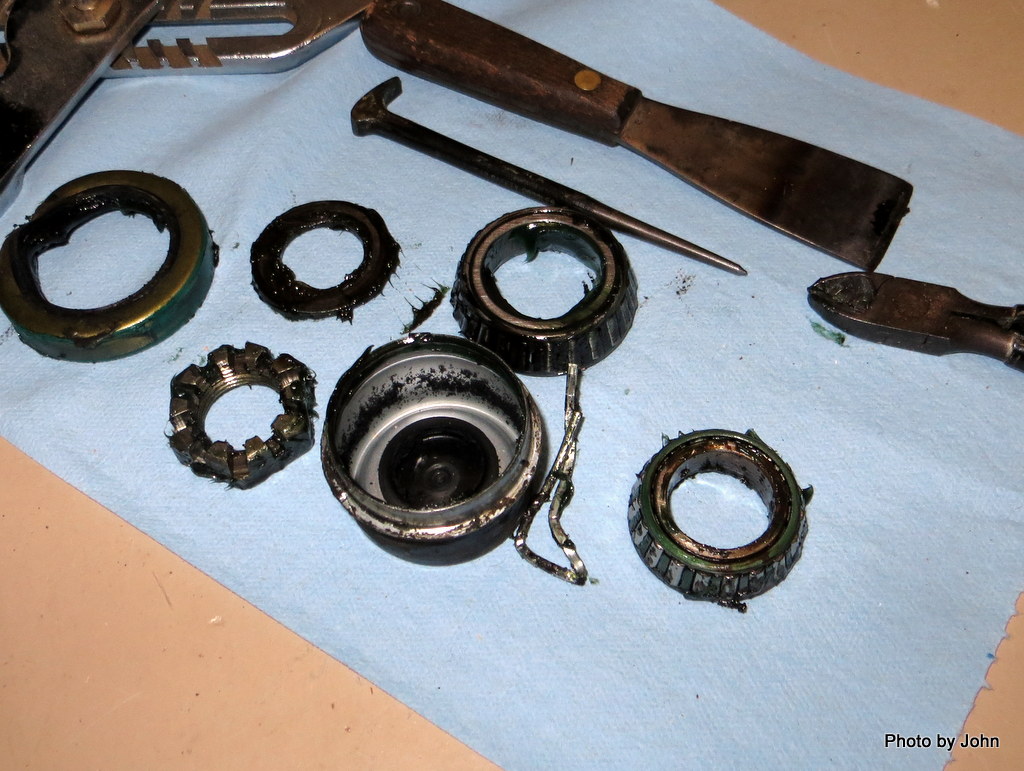
I always plan on not reusing the inner seal - the gold colored ring in the center of the picture. Now is the time to inspect the brake drum for undue wear.
I use the punch end of the rolling wedge bar to remove the seal. It usually takes three or four punch & pry cycles to get it out. Others will advocate driving it out by pressing out the rear bearing from the inside, but that runs the risk of damaging the bearing so I'm comfortable with automatically replacing the seal with a new one.
As you can see, the cotter pin doesn't come out nicely on the Al-Ko 3500 lb. Ultrulube spindle. The hole for the cotter pin is drilled off center to leave clearance for the Zerk fitting and grease galley in the center of the spindle, creating interference between the cotter pin and the nut castellations.
While cleaning the parts, carefully inspected the bearing for any chipping, pitting, flat spots, or discoloration of the bearing rollers or deformation of the bearing cage.
Keep the parts for each wheel together since the bearings theoretically develop a wear pattern matching with their outer race.
To hand pack the bearings, put a glob of appropriate grease (Al-Ko calls for a NLGI Grade 2 lithium based grease) in your least dominate hand.
Holding the bearing cone with the smaller diameter up, press the cone into the edge of the glob (there's that technical term again) of grease, continuing the process until grease extrudes from the top of the bearing. Turn the bearing assembly slightly and repeat. Continue until the entire bearing cone has clean grease coming out between the inner race and the bearing cage.
Clean all of the old grease out of the hub assembly.
Assuming the bearing cone and outer cup look good and you've carefully repacked the bearing, place the rear (larger) bearing into the hub and install a new grease seal. I use a soft block of wood and a hammer to press the grease seal in place without deforming it.
Clean all the old grease off of the wheel spindle. Use this opportunity to inspect the brake shoes, springs, and magnet for excess wear. Wipe a very slight amount of grease on the lip of the grease seal before carefully putting the hub (and wheel in my case) assembly back on the spindle. Install the front bearing, washer, and nut.
Tightening the castellated wheel retaining nut correctly is critical. Too tight and the bearings will overheat. Too loose and the bearings will wear out from too much side play. The
Al-Ko manual (page 23) has specific instructions although most experienced mechanics do it by feel. In spite of the manual, install the cotter pin so that it does NOT go over the end of the spindle.
The last step is to reinstall the dust cap. Since the rubber plugs in the original dust caps were badly checked, I installed new caps and plugs. Once again, the block of soft wood came in handy.
I got all the parts from
Etrailer.com. The #84 spindle is very common and parts are readily available.
Just as when the trailer was new, check the hubs for excessive heat at your first stop after servicing the bearings.
Update April 1, 2013: there has been discussion about the advantage of high quality American made bearings. It takes a bit of searching, but larger, easy to pack, cool running bearings are available but will require modification to fit to current production wheels.