After years of backpacking tents, we upgraded to a Scamp 19 trailer. Our RV friends comment about how small it is. Our hiking and kayaking friends comment on how big it is. We think it's just right! Sure is easier making and breaking camp in the rain.
Our Scamp is a 2010 Deluxe version with the Birch interior and most of the available options.
Power Draw
Since we do enjoy boondocking and don't enjoy listening to generators, we pay close attention to the power draw of various equipment in the trailer. It's amazing how many people are aware of the issue, but don't have the data to help make logical decisions. In some cases, the draw varies slightly - I'm showing the max draw observed after the equipment is stable.
04.4 watts Dometic RM2620 Refrigerator - same draw on "Auto" or "Gas" whenever gas is flowing
01.9 watts LED replacement lamp 144 Lumen from LED Wholesalers on Amazon
19.4 watts Stock 1141 incandescent lamp - I've replaced all of them with LEDs
15.5 / 23.3 / 33.8 watts Fantastic Fan at the three speeds. Direction doesn't matter.
43.6 watts Heater when heating - 36 watts for the fan only (during cool down)
39.4 watts Standard water pressure pump
06.0 watts TrippLite "LapPower" 100 watt inverter with no AC load.
110 watts Atwood Landing Gear motor
04.0 watts Caframo "Bora" Fan on highest speed
05.0 watts Samsung Galaxy Nexus phone on 12v. Verizon charger
02.5 watts Millenicom 4620 MiFi Hotspot on 12v. Verizon charger, connected
02.0 watts Wilson Sleek 4V Amplifier
60~ watts HP Laptop charging using 110v adapter and TrippLite 100 watt inverter
45~ watts HP Laptop charging using 12v adapter
06.9 watts Kitchen Range Hood fans
06.1 watts Overhead Cabinet Rope Lights, ea.
Refrigerator, Fantastic Fan, Heater, and Water Pressure Pump are as delivered from Scamp. All measurements made with Doc Watson meter.
Modifications
We've made a number of modifications, primarily to improve endurance when boondocking.
Canoe Rack
 |
| Canoe Rack Upright |
 |
| Completed Rack w Canoe |
The canoe rack bolts to blocks that are epoxied and screwed to the roof. Each mount is located near the trolley top flange, gaining additional strength from the curves in the structure. The uprights in the rear are nearly 11" high so that the canoe clears the air conditioner and are set at an angle to eliminate any lateral racking. The front mounts are just tall enough for the canoe to clear the front structure. Crossbars are standard Yakima bars, removed from the canopy that had been on the pickup.
While the rack might be able to handle a heavy canoe, it's much easier to load a light weight Kevlar canoe.
The rack worked well for us but it was a hassle to load the canoe. We've now taken the rack off the trailer and carry the canoe on the pickup.
Charge Wizard
 |
| PD Charge Wizard |
One of the first, and simplest modifications was the installation of the Progressive Dynamics Charge Wizard. This unit plugs into the factory original Progressive Dynamics 9130 Converter. It manages the battery charging voltage to maintain the battery without overcharging. As a result, we can keep the trailer plugged in to power while its in storage. I mounted the wizard on the face of the dinette bench next to the fuse panel.
This served very well until I installed LiFePO4 batteries in October 2024.
Electric Landing Gear Motor
 |
| Atwood Motor & Gearbox |
 |
| The Magic Switch |
The trailer comes stock with a hand crank for the landing gear. Atwood makes an electric motor for the landing gear that works very well. Seems like a pretty essential piece of equipment to me. It takes longer to mount the control switch and hook up the wiring than it does to install the motor.
A Drawer for the Stinky Slinky
 |
| Drawer holds two lengths of hose |
The trailer came with a storage tube too short for a reasonable dump tube. A vinyl fence post, a piece of vinyl gutter, a few PVC caps, a couple pieces of PVC pipe, and two caps for the fence post quickly became a container and a drawer for two 10' pieces of drain hose. Two pieces of unistrut and some all-thread mounted the unit below the battery & LP rack.
Heavy Duty Tires
 |
| Maxxis UE-168 205R14 Commercial |
The "C" rated trailer tires were replaced with "D" rated light truck tires. They have considerably higher load rating and speed rating, providing much greater margin than the original tires. These trailers were originally designed with 13" wheels but this trailer came from the factory with the optional 14" wheels and has a 1.5" lift to provide the necessary clearance. See the April 5, 2013
blog post for an update and the September 6, 2013
blog post for yet another update.
LED Lights
 |
| LED replacements |
All of the 12 volt lights in the trailer have been replaced with LED units purchased from Amazon. They draw much less than the stock incandescent bulbs. We can have every light in the house turned on for about the same draw as one incandescent lamp. A side benefit is the lack of heat buildup. These should be stock!
Light Weight LP Tank
 |
| 25 Lb Lite Cylinder & 2x GC2 Batteries |
In order to make room for dual 6 volt golf cart batteries, we switched to a single 25 pound capacity light weight Fiberglas "Lite Cylinder" LP tank. The slightly larger diameter leads to some pretty significant mods to the front basket, but the end result is worthwhile for our style of operation. The Fiberglas tank is translucent so you can see how much LP is in the tank. Meanwhile, the single tank leaves plenty of room to replace the stock Type 24 battery with a pair of Interstate Battery GC-2 6 volt batteries wired in series. The new battery combination provides over three times the stock battery capacity. See the June 12, 2013
blog post for an update on the Lite Cylinder.
In March 2018, I replaced the original Interstate batteries with a pair of US Battery 2200 which lasted for six years. They were replaced with a pair of LiFePO4 batteries in October 2024, using the same case as the 6 volt batteries.
Rock Guard
 |
| Plywood & Epoxy Rock Guard |
With the Lite Cylinder and upgraded batteries as well as dreams of at least one Alaska trip, I built a rock guard from 1/4" Baltic birch plywood using the "stitch-n-glue" technique common to some hand built kayaks. Not only does it protect the front of the trailer but it also hides the tank and batteries.
The outside surface and the inside joints are reinforced with 6 oz. fiberglas cloth and all of the wood is coated with two coats of epoxy resin before it was painted. The concept comes from a fellow in Minnesota who installed one fabricated from aluminum diamond plate on his trailer.
Ladder Storage
 |
| Ladder Storage in Vinyl Post |
One of the disadvantages of the boat rack on the trailer is that it requires a ladder. I messed around with a lot of options, but didn't find anything that really worked for me until I found Camping World's collapsible step ladder. It's a 5' double-sided step ladder that folds small enough to fit in a vinyl fence post.
I used the same cap retention concept that was used on the "stinky slinky" drawer, and mounted this tube where the loft framework intersects the landing gear mounts. This time I used some 1/2" square steel tube to fabricate the brackets to hold the tube in place.
12 Volt Outlets
 |
| Blue Sea 12v Outlet |
I was rather surprised to discover that this trailer came from the factory without any 12 volt outlets. I've added one on the end of the cabinet next to the street-side dinette bench, one near the closet door, and another in the loft next to the stock 12 volt light. There are two others dedicated to equipment on the communications shelf. They're especially handy for charging the cell phone or DVD player.
The first one I installed was from Blue Sea via Amazon. A very nice, clean installation complete with a cover for when it's not in use. The only down side was that they were fairly pricey considering the minimal cost of manufacturing, but they do have that "marine" association driving the price.
When I installed the second outlet, I expressly ordered one from Blue Sea and another similar "marine grade" outlet. The "marine grade" is very similar to Blue Sea but not quite as nice. On the other hand, it's half the price!
These were removed in March 2018 and replaced with a 12v + USB ports pair in each dinette location.
Shore Power
 |
| Marinco 30A Shore Service |
The stock shore power umbilical is functional, but the cord creates issues for use of the storage under the street-side dinette bench. In addition, the cover for the cord stowage port leaves a gap that allows for ants or other bugs to wander in for a visit, even when they're not invited.
The Marinco 30 amp connector set solved both problems. Now the connect point to the trailer is weather and bug proof, and the umbilical is detached from trailer. In our case, it's now stored in Rubbermaid Action Packer along with the hose, Lego style leveling blocks, etc.
I did this one in preparation for putting a water tank under this bench, a twin to the one on the other side, but that project is on hold for now. Meanwhile, we have a nice storage area for stuff that we don't have to access often.
Doc Watson
 |
| Doc Watson meter |
One of the challenges of boondocking involves awareness of battery status. It does no good to plan an 8 day trip if the battery is flat after 2 days because you sat in the trailer watching TV. Some people depend on a voltmeter to provide a basic sense of charge. Others, especially if they have installed a large & relatively complex solar system will install meters to track both the draw from the battery and the charge to the battery.
Needless to say, those two approaches vary widely in cost. Somewhere in the middle is the Doc Watson meter. It will measure either charge to, or draw from the battery, but not both. In our installation, I've installed it to measure draw. It will show draw at the moment as well as total draw since it was last reset. In addition, it provides voltage at the moment as well as peak voltage since it was last reset.
This give me enough info to keep an eye on the remaining capacity of the batteries. If we're traveling, it's not a big deal, but boondocking for a week does require keeping aware of power consumption.
Indoor-Outdoor Thermometer
 |
| Lock N Lock container for sender |
Initially we got this for the obvious reason. The outdoor wireless sensor is mounted in a plastic Lock-n-Lock container mounted under the loft overhang. The containers are designed to be waterproof. I drilled a small hole under each of the four snaps so that the box can breath but it's not likely to get water driven into the container during travel. This combination has worked well.
It was only after an individual on the Scampers Yahoo Group site noted that the Oregon Scientific thermometers could handle additional remote sensors that the light bulb went on. We now have one in the refrigerator so we can keep an eye on that as well.
Lounge
 |
| Modified Seat Back Cushion |
This one is Kamper Bob's fault. I was coveting his lounge seating as a place to stretch out our legs, and complaining about storing the bed extension in the closet, but we didn't want to make modifications to the table for the rare occasion when we want to seat four. BJ had already modified the seat back cushions, separating the small "wing" section from the longer section of the cushion.
Bob suggested storing the bed extension under the table. Putting the short "wing" sections on it holds it in place for travel and cushions our feet when we want to stretch out.
It's actually much easier to make up the bed than it was digging behind the clothes in the closet to get the extension. Thanks, KB for your great idea!
ScanGauge II
 |
| ScanGauge II |
This one isn't a mod to the trailer and it simply plugs in to the OBDII connector behind the dash in the truck. None the less, it's the fastest, most important, and beneficial mod I've done. With it we can watch transmission temperature in real time. I've set it up to show water temperature, inlet air temperature, and MPH as well. The ability for the gauge to correct for non-standard tire sizes was an extra benefit that I hadn't considered.
Besides the gauges, it also tracks fuel use since the last fill-up, estimated miles remaining to the bottom of the tank, etc. It's the one mod that I wouldn't be without.
Flat Floor in the Bath
 |
| Can't tell it's there |
The wet bath in the Scamp includes a shower basin. We seldom use the shower, so we turned the basin into storage. The whole story is
posted on the blog.
Scissor Style Stabilizers
 |
| Scissor Stabilizers |
The original stabilizers were too short and not very steady. I installed a pair of scissor style stabilizers set at an angle to the trailer for more stability. The whole story is
posted on the blog.
Snap Pins
 |
| Snap Pins for Clean Hands |
The original pins for adjusting the length of the front landing gear required messing around with greasy clips. Installing Snap Pins solved that issue. The whole story is
posted on the blog.
External Hatch Installation
 |
| 11 x 15 Access Hatch |
We installed a small external hatch under the curb-side dinette seat to provide easy access to the plumbing in that area. The installation technique could be applicable to any hatch installation project. Keep in mind prefabricated hatches expect to be installed in a flat surface. A large hatch will require some creative fairing to provide for a flat flange. The whole story is
posted on the blog. See the Nov. 12, 2013
blog post for the other side.
Water Transfer Pump
 |
| Reorganized Water System |
Being too lazy and adverse to getting wet while pouring water from jerry cans into the gravity fill port, I installed a 12v water transfer pump that pulls from jerry cans on the ground to refill the on-board fresh water tank. This allows us to refill from pitcher pumps, etc.
Details are on in the August 29, 2012
blog post.
Toilet Supply Valve
 |
| Toilet Supply Valve |
The toilet in the Scamp does not have a shut-off valve in the supply line. This is challenging if you have a flush valve failure while on a city water supply, requiring you to shut off all water to the Scamp. It's also a limitation when boondocking and wanting to control water use. Installation is very easy.
Details are on in the September 4, 2012
blog post.
Sealing Floor Holes
 |
| Filling holes in the floor |
It's not a mod, but it's essential to maintaining the integrity of the floor over time. Details are in the September 7, 2012
blog post.
Caframo Bora Fan
 |
| Improved Loft Circulation |
Installed a small 12 volt fan at the top of the stairs to improve circulation in the loft. This fan draws much less power than the Fantastic Fan installed over the dinette. Installation details are in the September 9, 2012
blog post.
Phlip-It Latches
 |
| Latch lever |
This has to be the simplest mod I've done with the exception of the tires where all I did was write the check. These latches are super simple to install and remove the plastic post from the original latches in the process. Installation details are in the September 12, 2012
blog post.
Cantilevered Shelf
 |
| Shelf for electronics |
The Novatel 4620 MiFi and Wilson Sleek amplifier needed a home, so I leveraged the wasted space above the bathroom door to install a cantilevered shelf. Installation details are in the November 17, 2012
blog post.
Window Awnings
 |
| Window Awning Project |
Leveraging concepts from an individual on the Casita forum, we added four window awnings for the side and rear dinette windows. The frames are constructed of PVC pipe and the awnings are sewn from Sunbrella fabric. The project did not require any holes to be drilled in the trailer body. The project was documented on the blog in November 2012 in 3 parts.
Part 1 installs the awning rail,
Part 2 fabricates the frames, and
Part 3 assembles the awnings.
Cellular Antenna Installation
 |
| Folding Cellular Antenna |
The foil faced insulation in the Scamp degrades cellular signals. Driven by the desire for strong and fast internet connectivity, we installed an external cell antenna for the Millenicom Novatel 4620 MiFi that provides our internet connectivity. Details are in the December 1, 2012
blog post.
Power Distribution
 |
| Ground & 12 Volt Buss Bars |
With a collection of USB powered electronics on the communications shelf and a couple of 12 volt convenience outlets in the neighborhood, we installed a power distribution location in the top of the cabinet to the left of the bathroom door. Details are in the December 5, 2012
blog post.
Reflective Tape
With the stock tail lights mounted low and no third brake light, the Scamp can benefit from additional night visibility. The reflective tape also makes it easier to find in a dark camp.
Tape Jungle stocks 1/2 inch wide engineering grade reflective tape that will work on the belly band. Details are in the December 9, 2012
blog post.
Hitch Height Indicator
For a couple years, I carried a tape measure to determine when the hitch was high enough to clear the ball in the bed of the truck. This makes it much easier. Details are in the December 19, 2012
blog post.
Door Props
The upper cabinet doors can be a bit of a pain, especially when provisioning the trailer in preparation for a trip. Folks have tried a variety of methods to hold them open. With lots of help from friends, this is my solution. Details are in the January 3, 2013
blog post.
Ikea Bygel Baskets
While looking for storage options for the trailer we ran across Ikea's Bygel baskets. Two of them fit nicely above the table at the back of the trailer and handle all those little things that were taking up counter space. Details are in the February 21, 2013
blog post.
Swivel Bullet Lights
We finally got rid of the ugly 1970's style swivel spot lights and replaced them with units that are more compact and have a much better switch. Details are in the February 25, 2013
blog post.
Adding a Trunk
There are some very nice trunks available but we decided to do the minimal investment version. The simple solution was an ATV load rack from Harbor Freight topped with a 35 gallon Rubbermaid Action Packer. This will normally ride in the 2" receiver on the back of the Scamp. Details are in the March 20, 2013
blog post.
Charger Connections
We added connect posts to our front rock shield to make it easier to connect an external charger for a fast charge of our 208 amp hr battery bank. Details are in the March 30, 2013
blog post.
New Sink
We never cared for the small, shallow, plastic sink that was stock on the Scamp. A wander through IKEA presented a solution that works great. Details for the sink and Hepvo valve installation are in the
October 30, 2013,
November 2, 2013, and
November 5, 2013 blog posts.
Water Tank Improvements
I needed to improve on the water tank hold-downs since one broke somewhere along the way on our Alaska trip. In the process, I put in a clean-out access port and insulated the tank to stop the condensation that we experienced. Details are in the
December 29, 2013,
January 1, 2014, and
January 4, 2014 blog posts.
Clothes Line
BJ really liked the simplicity of the clothes line that Lynne uses on her Casita. It was made to bolt onto a 4" square tube bumper which is not what the Scamp has, so we did a bit of modification. I like it because the parts connected to the bumper are less obtrusive than the original design. See the
May 14, 2014 blog post for details.
LED Tail Lights
I've not been a fan of the tail lights on the Scamp. Since the design hasn't changed in decades, there is no third brake light and the tail lights are not very bright. Following another Scamper's example, I upgraded to the Bargman 07 series LED tail lights.
Much brighter! See the
August 17, 2014 blog post for details.
External Vent for Stove
Unlike Casitas, most Scamps don't have a range hood. I'm not a fan of the Ventline range hood, but did want a powered vent at the stove. Installed an Endura Range Vent from JR Products and we'll build our own hood for the vent. See the
August 23, 2014 blog post for details on the installation of the external vent.
Improved Door Latch
I finally broke down and installed an improved lock set. While it's pretty invasive surgery, with photos from several people who had already done a similar installation, it wasn't too intimidating. It's a big improvement over the stock latch. See the
August 26, 2014 blog post for details.
Tinted Windows
We've talked about tinting the Scamp windows to reduce heat gain for a couple years and this year we decided it was past time to do it. Did some research, looking for film that limited heat gain rather than just darkened the windows. We ended up using Madico's Wincos ceramic film and we're real happy with the results. See the
September 10, 2014 blog post for details.
Nev-R-Adjust Brakes
I was planning on some significant chassis work so took the opportunity to install new brake assemblies. Our original brakes had plenty of lining left but the actuating magnets were worn. I decided to install Dexter's Nev-R-Adjust brakes instead. They're a direct bolt-on replacement and I shouldn't have to mess around doing brakes adjustments in the future. See the
September 13, 2014 blog post for details.
Two Inch Lift
With over 240,000 miles on the Tacoma, we're starting to consider what a different tow would be. One thing is clear - bed rail heights on new trucks was going to require putting some lift under the Scamp. Originally shipped with a 3" lift, we reduced it to 1.5" to make clearance for the canoe rack with our garage door. Now the canoe rack comes off and we put 2 more inches in for a total of 3.5" lift. See the
September 16, 2014 blog post for details.
Monroe Shock Absorbers
I've considered ways to install shocks on the Scamp since it was new but getting good dimensional data on shocks is challenging. This year, Orbital Machine Works released a bolt-on kit for Casita trailers. The upper mount wouldn't directly fit, but the lower mount does. Following conversations with Orbital, I bought their lower mounts and fabricated our own upper mount for a clean installation. See the
September 19, 2014 blog post for details.
Powered Range Vent
I finally got the powered range vent fabricated and installed. I used three 12 volt computer cooling fans to power the vent. See the
September 28, 2014 blog post for details. Testing shows that it works well when you remember to unlatch the flapper door of the
exterior vent.
Posterized Refrigerator Door
I saw
Jon Vermilye's mod to his refrigerator door and loved the concept, using that big blank space to bring the outdoors in. I intentionally took a lot of portrait oriented photos on our latest
Green River trip and then asked
FGRV readers and Facebook friends as well as my regular blog readers to vote on their favorites. This turned out to be the easiest mod I've done on the trailer! See the
November 5, 2014 blog post for details.
Overhead Cabinet Interior Lights
We've kept small flashlights in some of the overhead cabinets to be able to see the contents at night. I installed strips of waterproof LED rope lights to fix the situation. See the
December 7, 2014 blog post for details. They draw more power than our
LED reading lamps or overhead lights, but do a wonderful job of illuminating the subject.
Door Sill Seal Replacement
I replaced the seal around the entrance door years ago. This year the foam seal on the door seal gave up, so I went back to my seal source looking for something that would stand up to more abuse than the stock open cell foam. See the
December 9, 2014 blog post for details. Note:
Scamp just announced a new seal that looks like it would do the job.
Solar Selection & Installation
It took me about three years to finally get around to installing solar on the trailer. The advantage was that I had a lot of accurate data regarding our power utilization patterns and the Scamp was optimized for 12 volt operations. Lots of on line research and some conversations with highly regarded practitioners preceded hardware selection but the end result works very well
for us. Power demands and camping style has a major impact on the viability, but for us, this was a home run! Details are
on the blog in January, 2015. If you follow the link, read the four posts from the bottom up.
Installed LiFePO4 Batteries - October, 2024
The 6 volt batteries were getting long in the tooth with over 6 years of use, and the price of Lithium batteries was dropping significantly so the lead-acid was replaced with a pair of Type 24 sized, 100 amp hour lithium batteries. This nearly doubled our usable capacity and reduced weight by about 70 lbs, while nicely fitting in the case that had previously housed the pair of golf cart batteries.
Since the lithium batteries use a different charging curve, I needed to update the solar controller and the Progressive Dynamics inverter. The old Renogy controller was replaced with a Victron unit while the 9130 inverter was replaced by the newer 9330V. Both the batteries and the solar controller have Bluetooth which makes it easy to watch the state of the batteries and the solar gain.
More mods when when we decide we really need them which doesn't seem very often anymore!


 Bob suggested storing the bed extension under the table. Putting the short "wing" sections on it holds it in place for travel and cushions our feet when we want to stretch out.
  With the stock tail lights mounted low and no third brake light, the Scamp can benefit from additional night visibility. The reflective tape also makes it easier to find in a dark camp. Tape Jungle stocks 1/2 inch wide engineering grade reflective tape that will work on the belly band. Details are in the December 9, 2012 blog post.
 For a couple years, I carried a tape measure to determine when the hitch was high enough to clear the ball in the bed of the truck. This makes it much easier. Details are in the December 19, 2012 blog post.
 The upper cabinet doors can be a bit of a pain, especially when provisioning the trailer in preparation for a trip. Folks have tried a variety of methods to hold them open. With lots of help from friends, this is my solution. Details are in the January 3, 2013 blog post.
 While looking for storage options for the trailer we ran across Ikea's Bygel baskets. Two of them fit nicely above the table at the back of the trailer and handle all those little things that were taking up counter space. Details are in the February 21, 2013 blog post.
 We finally got rid of the ugly 1970's style swivel spot lights and replaced them with units that are more compact and have a much better switch. Details are in the February 25, 2013 blog post.
 There are some very nice trunks available but we decided to do the minimal investment version. The simple solution was an ATV load rack from Harbor Freight topped with a 35 gallon Rubbermaid Action Packer. This will normally ride in the 2" receiver on the back of the Scamp. Details are in the March 20, 2013 blog post.
 We added connect posts to our front rock shield to make it easier to connect an external charger for a fast charge of our 208 amp hr battery bank. Details are in the March 30, 2013 blog post.
 We never cared for the small, shallow, plastic sink that was stock on the Scamp. A wander through IKEA presented a solution that works great. Details for the sink and Hepvo valve installation are in the October 30, 2013, November 2, 2013, and November 5, 2013 blog posts.
 I needed to improve on the water tank hold-downs since one broke somewhere along the way on our Alaska trip. In the process, I put in a clean-out access port and insulated the tank to stop the condensation that we experienced. Details are in the December 29, 2013, January 1, 2014, and January 4, 2014 blog posts.
 BJ really liked the simplicity of the clothes line that Lynne uses on her Casita. It was made to bolt onto a 4" square tube bumper which is not what the Scamp has, so we did a bit of modification. I like it because the parts connected to the bumper are less obtrusive than the original design. See the May 14, 2014 blog post for details.
 I've not been a fan of the tail lights on the Scamp. Since the design hasn't changed in decades, there is no third brake light and the tail lights are not very bright. Following another Scamper's example, I upgraded to the Bargman 07 series LED tail lights. Much brighter! See the August 17, 2014 blog post for details.
 Unlike Casitas, most Scamps don't have a range hood. I'm not a fan of the Ventline range hood, but did want a powered vent at the stove. Installed an Endura Range Vent from JR Products and we'll build our own hood for the vent. See the August 23, 2014 blog post for details on the installation of the external vent.
 I finally broke down and installed an improved lock set. While it's pretty invasive surgery, with photos from several people who had already done a similar installation, it wasn't too intimidating. It's a big improvement over the stock latch. See the August 26, 2014 blog post for details.
 We've talked about tinting the Scamp windows to reduce heat gain for a couple years and this year we decided it was past time to do it. Did some research, looking for film that limited heat gain rather than just darkened the windows. We ended up using Madico's Wincos ceramic film and we're real happy with the results. See the September 10, 2014 blog post for details.
 I was planning on some significant chassis work so took the opportunity to install new brake assemblies. Our original brakes had plenty of lining left but the actuating magnets were worn. I decided to install Dexter's Nev-R-Adjust brakes instead. They're a direct bolt-on replacement and I shouldn't have to mess around doing brakes adjustments in the future. See the September 13, 2014 blog post for details.
 With over 240,000 miles on the Tacoma, we're starting to consider what a different tow would be. One thing is clear - bed rail heights on new trucks was going to require putting some lift under the Scamp. Originally shipped with a 3" lift, we reduced it to 1.5" to make clearance for the canoe rack with our garage door. Now the canoe rack comes off and we put 2 more inches in for a total of 3.5" lift. See the September 16, 2014 blog post for details.
 I've considered ways to install shocks on the Scamp since it was new but getting good dimensional data on shocks is challenging. This year, Orbital Machine Works released a bolt-on kit for Casita trailers. The upper mount wouldn't directly fit, but the lower mount does. Following conversations with Orbital, I bought their lower mounts and fabricated our own upper mount for a clean installation. See the September 19, 2014 blog post for details.
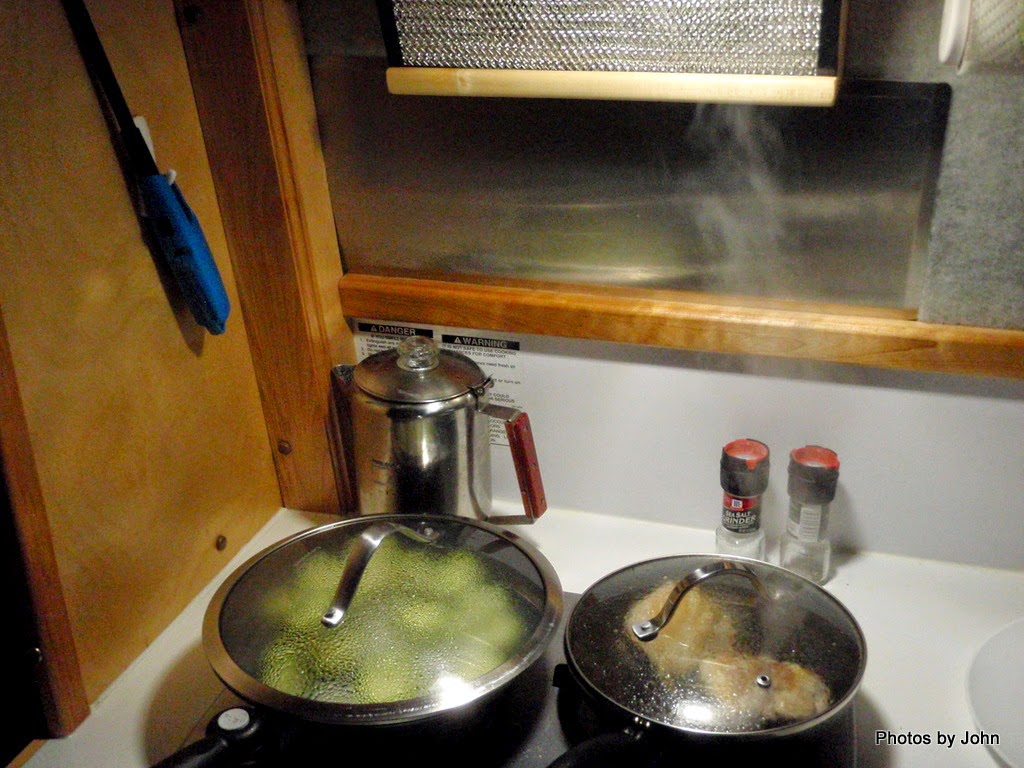 I finally got the powered range vent fabricated and installed. I used three 12 volt computer cooling fans to power the vent. See the September 28, 2014 blog post for details. Testing shows that it works well when you remember to unlatch the flapper door of the exterior vent.
 I saw Jon Vermilye's mod to his refrigerator door and loved the concept, using that big blank space to bring the outdoors in. I intentionally took a lot of portrait oriented photos on our latest Green River trip and then asked FGRV readers and Facebook friends as well as my regular blog readers to vote on their favorites. This turned out to be the easiest mod I've done on the trailer! See the November 5, 2014 blog post for details.
 We've kept small flashlights in some of the overhead cabinets to be able to see the contents at night. I installed strips of waterproof LED rope lights to fix the situation. See the December 7, 2014 blog post for details. They draw more power than our LED reading lamps or overhead lights, but do a wonderful job of illuminating the subject.
 I replaced the seal around the entrance door years ago. This year the foam seal on the door seal gave up, so I went back to my seal source looking for something that would stand up to more abuse than the stock open cell foam. See the December 9, 2014 blog post for details. Note: Scamp just announced a new seal that looks like it would do the job.
 It took me about three years to finally get around to installing solar on the trailer. The advantage was that I had a lot of accurate data regarding our power utilization patterns and the Scamp was optimized for 12 volt operations. Lots of on line research and some conversations with highly regarded practitioners preceded hardware selection but the end result works very well for us. Power demands and camping style has a major impact on the viability, but for us, this was a home run! Details are on the blog in January, 2015. If you follow the link, read the four posts from the bottom up.


John, We got the vinyl fence post, caps and gutter today to make the stinky slinky drawer. Can you provide any more detail on how the "Two pieces of unistrut and some all-thread ... " is used to mount the unit below the battery & LP rack. I've never used unistrut.
ReplyDeleteThe unistrut is a piece of steel channel with holes drilled in it at regular intervals. I could have just as easily used a piece of steel or aluminum strap or a piece of wood. The forward all-thread is formed into an over-grown "J" with the hook end going over the frame and the lower end going through the forward end of the unistrut piece. The rear piece of all-thread was welded to the trailer frame at the top and goes through the unistrut at the bottom. Can't attach pictures to the comment. BTW, we're headed to NM tomorrow and I expect we'll be in Roswell early next week. If you're in the phone book, I'll give a call.
ReplyDeleteThere are some very nice trunks available but we decided to do the minimal investment version. Thank you for sharing!
ReplyDeleteMy parents had a scamp 5th wheel...they traveled all over the west in it. When they died my brother inherited it and traveled for 10 more years, just selling it this summer to a friend who will take it fishing. Great memories!
ReplyDeleteIt's unique, but there's real value to something that is light and fits in our garage!
DeleteSo true! Was fun seeing yours.
DeleteWOW... WOW... WOW
ReplyDeleteUnbelievable!!! Thank you very much for sharing.
Just purchased my Scamp 5'er, love her now, going to really love her after I steal some of your most excellent journey experiences, and mod's.
Thank you very much for sharing.
Cheers. Eric. A Canadian fan. :-)
Hello sir,
ReplyDeleteIf you wouldn’t mind, I’d like to ask you a few questions about your towing experience with the Tacoma. I’m in the market for a trailer and have the same truck but am concerned about performance. If you don’t mind, would you send me an email when you get a chance? Thank you very much.
-Anthony